Linux as a Guest OS in Windows Virtual PC

To be absolutely clear what I’ll be writing about in this and future posts is the Windows 7 Pro (and higher) add-on Windows Virtual PC (WVPC). It is a descendant of the general purpose Microsoft Virtual PC but is different in that it was modified specifically to facilitate the Win7 XP Mode feature. Basically Microsoft intends WVPC to allow the running of XP, Vista and Windows 7 guests on a Windows 7 host, they do not support any other guest OSs. However they did not remove the capability to run other OSs they simply did not update some useful features for other OSs and they removed the integration components for Windows versions older than XP.

Getting any Linux distro setup on WVPC is not something the average user should attempt. If you want to try out different Linux distros and have all their features work you should definitely use different virtualization software. VirtualBox and VMWare are much easier to use and will let you properly evaluate distros.

I decided to play around with Linux on WVPC for a number of reasons.

  1. I already use it for XP Mode and when an app is running it isn’t obvious that VPC is running. If I had another virtualization platform installed I could accidentally run it at the same time which could crash Windows badly. So to be safe only VPC will ever be installed on my Win7 PC.
  2. I occasionally need to run software that is only available on Linux e.g. the libpst library
  3. Having played around with Linux on and off since 1998 I actually find it fun to dig into the OS guts to get it working on unsupported hardware. I still remember the thrill of compiling a newer version of the kernel for the first time and it making a new system work.

In later posts I’ll detail how I got specific distros running but for now I just want to cover a few generic tips. The first tip is don’t expect to find a lot of useful information on the net. Most discussion threads about this topic quickly end with the person asking for help being convinced to give up and just use VirtualBox or VMWare. Most of the blog posts you’ll see are for Microsoft Virtual PC 2004 or 2007, products that officially supported Linux as a guest OS so they often are not applicable to WVPC.

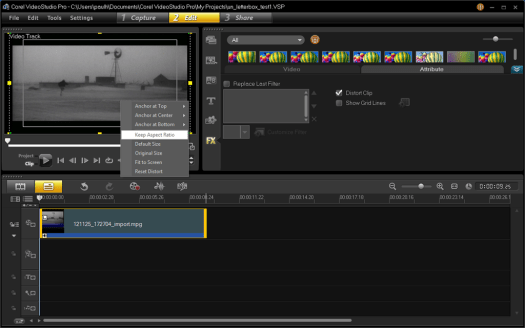
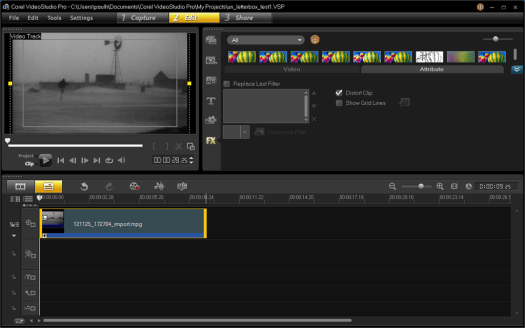
Tip number two is lower your expectations, don’t expect to run X-Windows in high resolution, watch video or listen to music. Much of the problem stems from the fact that there are no integration components supplied for newer Linux distros. If you look in  “C:\Program Files\Microsoft Virtual Server\Virtual Machine Additions” you’ll see that the old additions for Linux are there but since they have not been updated since 2007 they are basically useless.

The third tip is to expect that you will need to add kernel boot parameters to get any install going reliably and then you may need to manually add some of them to the GRUB configuration after a successful install. In my playing around so far I have found that noreplace-paravirt, i8042.noloop and clocksource=pit (clock=pit for older kernels) are the minimum. In some cases you may also need a vga=788 option as well. There is an old blog post from 2009 that explains the first options fairly well. In addition to what is said in that old post about the clocksource option, Ben Armstrong of Microsoft posted in 2006 about how the clock option prevents a key repeat problem. For even greater detail on the clocksource option read this Microsoft Knowledge Base article.

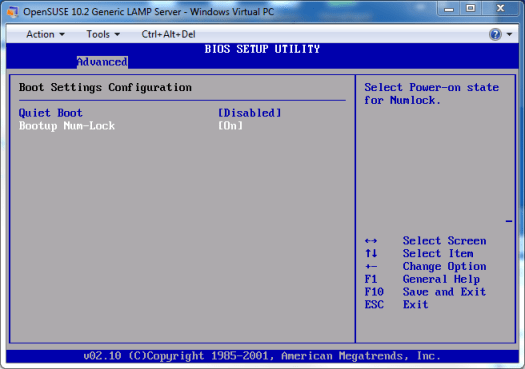
The next tip is only if you are a die hard numeric keypad user like me. I hate when Num Lock gets turned off, an accountant at work showed me how much more efficient data entry is with the keypad way back in the 1980s. After all this time my hand instantly goes to the keypad anytime I’m entering more than a couple digits so I find I just can’t live without it. To ensure the Num Lock stays on you have to set the VM BIOS option and usually set it in the OS as well. To set the BIOS option, press the Delete key as soon as the VM window opens to access the VM BIOS settings. Change the Advanced-Boot Setting Configuration-Bootup Num-Lock setting to On. Then press F10 to save and exit the BIOS settings.

Capture04

A final note on Num Lock, some guest OSs will toggle Num Lock on/off during the boot process. If the VM window looses focus during this time the Num Lock state may end up set incorrectly.

The last tip is about WVPC video RAM, the default setting when you create a new VM is 16 meg, the maximum supported, but it can be decreased by manually editing the XML file if you wish to save on host RAM. Although the VM has 16M, so far I’ve found that the amount detected by Linux is never 16MB. Some query mechanisms have returned 64M but all the ones that count always seem to detect only 4MB. I suspect the only way to resolve this would be to write a custom display driver, a task that presently I don’t think is worth the effort.

Blogroll is back

The blogroll on the left side has been empty for a long while. It used to be automatically updated via a  Google Reader feature but since the demise of Reader it stopped working. I hadn’t found any way to replace it with another automated system so today I manually created a blogroll. To avoid typing too much I exported my feeds from Feedly as OPML then converted that to a CSV file using this utility web service. Finally I re-arranged, cleaned up and deleted the extra data from the CSV in LibreOffice Calc and added a formula to make <a href> links out of the names and urls. Then I simply pasted the resulting list into a WordPress text widget.

Windows 7 Virtual PC Problem Solved

With the loss of my XP box I decided it was time to try out Windows Virtual PC and the XP Mode included in Win 7 Pro. It worked great so now I won’t need to resort to using my very old Win2K box to run a couple old CAD applications that won’t install in Win7.

After playing around with XP Mode a bit I decided to get adventurous and play around with getting other OSs running in Virtual PC. I have no idea how it happened but suddenly the Virtual Machines folder lost all the special buttons. Losing the Settings button was no big deal since I could simply left click and choose settings. However I couldn’t see a workaround for the loss of the Create virtual machine button. Fortunately Ben Armstrong had posted three solutions for the problem back in 2009.

Windows 8 Power User WiFi Tips

I purchased a netbook with Windows 8 last year and started using my WiFi more frequently. Windows 8 does not have the WiFi Profile manager like in previous versions of Windows but The Windows Club has a solution, WiFi Profile Manager 8, it works great.

With my frequent usage I also was getting annoyed with occasional drop outs. I noticed when the drop outs where happening I’d see neighbors access points show up in my listings which slowed me down by cluttering up the network connection list in the charms bar. Using the command line tool netsh I was able to fix both problems. First I used the

netsh wlan show networks mode=bssid

command to examine the connections, sure enough the nearest neighbor was using channel 6 the same as me and when the conditions are right his signal gets strong at my place. The other neighbor was on channel 11 so I changed my access point to use channel 1 and now I never drop out. FYI; there is major overlap in WiFi channels so you need to be five channels apart to eliminate all interference.

The netsh command tool also allowed me to block my neighbors access points from showing up in my WiFi list.

netsh wlan add filter permission=block ssid=neighbors_ssid networktype=infrastructure

References:

Netsh Commands

Showing All Your Neighbor’s WiFi Profile

How To Block A Computer From Accessing To A Specific Wireless Network

USB Drive Letters and Media Center Annoyances

First the Media Center Annoyance, whenever I plug in a thumb drive or flash card, Media Center would start reading it and sometimes would end up blocking me from ejecting the device. I’d been trying to figure out how to stop this from happening for a long time with no luck. One day I decided to search around for a solution and I found it on this page (the third post on the page).

I’ve been switching to USB connected external drives for data backup ever since I started doing a bunch of video editing because the giant files would overwhelm my NAS that holds the backups for my other projects. An annoying problem was that the drive letters assigned by Windows would sometimes vary and other times would get locked in to drive letter. For backup purposes I need to have the drive letters be consistent and I found the Holy Grail of USB drive letter management, USB Drive Letter Manager for Windows (USBDLM) by Uwe Sieber. It is definitely not for the average PC user but if you’ve got the skills it is a fantastic little service. I need to check out the other little utilities and services on the web site. I especially need to check out the COM-Port manager it will likely save me from having to use the COM port deletion technique from my previous blog post (note to self, do this before buying that 8 port adapter).

Windows 7 Desktop Shortcuts and USB COM port problems solved

A while back (I’ve been too busy to blog much for almost a year) I was puzzled to find some of my desktop shortcuts disappearing seemingly randomly. A page in the Microsoft Knowledge base explained why it was happening. In my particular case the shortcuts where pointing to network shares and documents and neither of the proposed solutions was right for me. Then in a flash of inspiration I realized that if I put those shortcuts inside of a folder on the desktop the System Maintenance troubleshooter doesn’t touch them.

My old XP box finally died so I had to move my USB to EIA-232 adaptors to my Win 7 box. Shuffling the devices around between various USB ports and hubs I saw the old problem of new COM port numbers being assigned to the adaptor with each USB port change. This of course rapidly leads to having to deal with COM10+. I vaguely remembered that there was a way to remove the extra ports so that once the adaptors where in their final USB destinations they’d have the low numbers I like. Searching around I found this excellent page with instructions.

See Also:
Device Manager does not display devices that are not connected to the Windows XP-based computer, from Microsfot
How to Find Hidden COM Ports, from Adafruit
USBDeview, from NirSoft

3/16/2015 Update: Updated the rttycontesting.com URL, added other reference URLS

Convert letterboxed video to widescreen in Corel VideoStudio X5

There is a great web page by Trevor Andrew about working with 16:9 video in Corel VideoStudio 10. In particular I needed to use the section about 3/4 of the way down the page titled “Ok let’s change a 4:3 aspect ratio to 16:9“. I wanted to crop a 16:9 video that was captured in letterboxed 4:3 format and I’m using Corel VideoStudio X5, so the screen shots and some option locations are different. Here are screen shots and modified steps to make Trevor’s page match X5 exactly.

Differences are in parenthesis, my VSP X5 changes are in bold italics

  1. Change the project properties to use 16:9 aspect (File – Project Properties-Edit-General tab) (Settings – Enable Widescreen)
  2. With the 4:3 video in the top track select the (‘Attributes Tab’. Select the “Distort” button.) (Open the Options panel, Select the Attributes Tab and check the Distort Clip checkbox)
  3. Right click the preview screen and select “Fit to screen”
  4. Right click the preview screen and select “Keep aspect ratio”


VSPX5_UnLetterboxCapture6VSPX5_UnLetterboxCapture0VSPX5_UnLetterboxCapture1VSPX5_UnLetterboxCapture2VSPX5_UnLetterboxCapture3VSPX5_UnLetterboxCapture4VSPX5_UnLetterboxCapture5

Cell Phone & GPS Jammer FCC News

Jamming devices are not only illegal they put others at risk, e.g. jammers can prevent timely response to a medical emergency. In its never ending battle to keep the radio spectrum functional for all of us the FCC has taken the following actions.

FCC ENFORCEMENT BUREAU ROLLS OUT NEW JAMMER TIP LINE: 1-855-55-NOJAM.

Word DOC, PDF, TXT

FCC ENFORCEMENT BUREAU TAKES ACTION AGAINST CRAIGSLIST SELLERS FOR MARKETING ILLEGAL SIGNAL JAMMING DEVICES.

Warns Consumers to Immediately Remove Online Jammer Ads; Issues Consumer Alerts in Spanish and Mandarin Chinese.

Word DOC, PDF, TXT

FCC ENFORCEMENT ADVISORY (TRANSLATIONS): CELL JAMMERS, GPS JAMMERS, AND OTHER JAMMING DEVICES, CONSUMER ALERT: USING OR IMPORTING JAMMERS IS ILLEGAL, MONETARY PENALTIES CAN EXCEED $100,000 PER VIOLATION.

The Enforcement Bureau Releases Chinese and Spanish Language Versions of an Enforcement Advisory Warning that Signal Jamming Devices May Not Be Advertised or Sold in the United States.

Word DOC , Word DOC, Word DOC, PDF, PDF, PDF, TXT, TXT, TXT

Official Citation to Scott Sandlin Word DOC, PDF, TXT

Official Citation to Keith Grabowsky Word DOC, PDF, TXT

Official Citation to Joseph Hundley Word DOC, PDF, TXT

Official Citation to George Conde Word DOC, PDF, TXT

Official Citation to John Bering Word DOC, PDF, TXT

Official Citation to Dancing Bear Technologies Word DOC, PDF, TXT